Today I was trying to use SyncBackPro to backup some files to OneDrive for Business (also styled as Office 365). I was trying to do some tests, but the backup kept failing, and the SyncBackPro log stated "Directory does not exist on Office 365 and cannot be created: The filename (Old_files) may not be allowed on this cloud service. NameAlreadyExists: A resource with the same name already exists".
After trying a few things, I discovered that all I needed to do was to change the name of the local folder from Old_files to something else.
To test this a bit further, I tried manually creating a folder called Old_files in the web interface, and the folder was created. However, the actual folder name that was created was not "Old_files" but had been changed silently to "Old_files_". So my guess is that Old_files is a folder that gets created automatically in all OneDrive files, and that it is hidden completely from the user. Likely it contains backup files that will be automatically deleted at some point. It was interesting.
Wednesday, September 30, 2015
Wednesday, July 8, 2015
Turning a budget Costco branded R4500 router into a screaming WNDR4500 running dd-wrt

Pictured above is the venerable R4500 wireless N router from Netgear. This piece of hardware has a lot good things going for it, most of which I don't understand so I won't elaborate. What I do know is that it's a dual band wireless N router with a pretty power processor. The best part about it, though, and the reason I purchased it (refurbished from Newegg for the absurdly low price of $35) is that dd-wrt is compatible with it.
For those unfamiliar, dd-wrt is an open source, third party firmware for consumer-based routers that adds a ton of software functionality that is typically reserved for expensive commercial routers. The downside is that it hasn't been made to work with all routers, and it takes a certain amount of bravery and technical knowledge to get running. Not that I'm super familiar with the specifics of how it all works, but I sure can Google up a storm. The bravery comes in because it is a fairly common occurrence to "brick" a router when trying to install or upgrade dd-wrt, and attempting to use dd-wrt (or one of the other options such as Tomato router or OpenWRT) typically voids the warranty of the device.
The first thing of note about this particular router is that it isn't the standard consumer model, which is model WNDR4500. The designation R4500 indicates that this particular router was originally sold at Costco, which often markets consumer products that have been specially made to be sold at Costco. The downside to this is twofold: One, the official WNDR4500 firmware updates don't work for this device, and the R4500 hasn't gotten as much love from Netgear; and two, dd-wrt hasn't been tested on the R4500 specifically, and my understanding is that you can't jump straight from the R4500 firmware to dd-wrt.
Fortunately, the hardware is all identical to the standard consumer version, it's just the firmware that is different. Fortunately, there are several resources online that give instructions on how to replace the R4500 firmware with the WNDR4500 firmware, which for all intents and purposes turns the device into a WNDR4500. I won't repeat those instructions here, but the first link to Slickdeals gives a very good description of what to do.
I ran into some trouble, though, right after running the telnet commands. When I rebooted the router from the web interface, it appeared to be bricked. The power LED was just flashing green, and no amount of reset button pressing or holding seemed to be doing anything. I was disappointed, and considered sending it back to Newegg. However, after unplugging it for a few hours, when I plugged it back in suddenly the router was working again. I was then able to flash the WNDR4500 firmware, then the dd-wrt build 26138 recommended on the dd-wrt wiki page. After reading or skimming all of the 80 pages of posts on the WNDR4500 thread at dd-wrt, I have elected to remain with the 26138 dd-wrt build, and I won't be flashing back to the 25015 Kong build, nor upgrading to a new build, unless I run into problems. (Basically, that build is the latest Kong build because Kong now contributes directly to the central dd-wrt SVN database.)
Setting up the network
With the router ready to go, I took some guidance from this video to put my modem/router (a ZyXEL C1000Z from CenturyLink) into Transparent Bridge mode, which basically removes all router functionality, leaving the device to act solely as a modem. I also shut off the wireless on the router, because there's no need for it.Next I put set the Connection Type in dd-wrt to PPPoE. It took a brief 8 minute call to CenturyLink (not too bad considering it was after 8 PM) to get the PPPoE password so that the router could log into the DSL network. It took a little finagling to get the IP address all squared away, and then I set up the two wifi networks for 2.4 GHz and 5 GHz.
Initially, I set the 2.4 GHz for wireless G only, in an effort to avoid a Mixed network (many people online say that mixed networks tend to have more issues and be slower), and I planned to just have all the N devices connect to the 5 GHz wireless N network. But I soon found that only dual band wifi adapters can connect to the higher frequency band, and we have a couple of cheap laptops that only have the single band adapters. I need the wireless G for the time being at least so that we can print to our non-wireless printer, which is connected to an old Linksys WRT54GS (also running dd-wrt). I hope that someday soon we'll be able to upgrade our printer to a wireless printer. Then we could ditch wireless G entirely I believe.
One last issue: I found after rebooting the router one time that the Edimax adapters no longer could see the 5 GHz network. It turns out that they can only see certain 5 GHz channels, and the channel selection was set to Auto in dd-wrt, and the new channel it chose must be an unsupported channel. What the allowable channels are, are I do not know, as I couldn't find any documentation stating this fact, but I suspect they can only see the higher channels from 149-165 or so.
Note: This post is part of a loose series. Go here for a full list of all posts in the series.
Sunday, July 5, 2015
Samba network shares
Samba background
Samba is a service that basically allows Windows systems to read and write to disks on a Linux system. Previously, I had set up the Samba server to allow unfettered access by any user to the storage drive. However, with a somewhat better understanding of security these days, I decided to work to require a username and password to the Samba share on the network.There are a few options for how to do this. One way is to manually add every Window's user on the network as a user on the Ubuntu system, and give each one access rights to the Samba share. Another option is to have a generic login and password that all users can use. Since I'm not trying to compartmentalize the Samba share and I just want to provide enough security to prevent any happenstance users from accessing the system, I went with the latter option.
Setting up the share
I already had Samba installed on the system, having checked it off in the Software Selection portion of the Ubuntu Mate installation process (can be run again using sudo tasksel).


sudo service smbd restartI created a new account called "mancusouser" for all computers on the network to access the shared drive, as well as a corresponding group. This page was helpful for learning how to set a primary group for a user.
To enable the correct mounting of the storage drive on the server, I used gnome-disk-utility, which is basically a GUI front end for fstab. It worked really well, and I highly recommend checking it out if you feel more comfortable with something taking care of the nitty-gritty details for you.

Troubleshooting
Of course, nothing worked correctly at first.My first attempt to make the Samba share was actually successful, but this was using the default login "gordon" for access to the share. After changing to just "mancusouser" having access, I of course had to log in as the new user from the Windows side. However, after doing so, I got a network permissions error message like the one below:

Using my deductive skills, I assumed this was an issue with permissions. I looked at the default mount location, which was /media/gordon/Elements, and saw that the permissions were only for the user "gordon". I tried to change this using chmod, but that didn't work. I found out that you cannot change the permissions of an NTFS formatted drive, which this drive sadly is (it used to be an external drive, so at the time NTFS made sense).
To rectify this, use options when mounting the drive. For example, to mount a drive using a specified user and group ID,
mount -o uid=userID,gid=groupID /dev/sdc /path/to/mountTo find the correct user and group ID numbers, look at /etc/passwd (for user) and /etc/group (for group). These options can also be written into fstab, which is what I did, making the owner and group of the mount "mancusouser" and "mancusofam".
After making this change, I tried again, but still was presented with the permissions error. I found this page helpful for showing how to delete network share passwords, which let me "refresh" the login as needed without having to reboot. But despite this, I still couldn't connect using the "mancusouser" login.
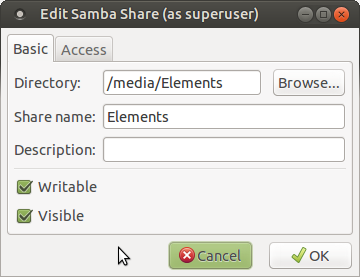
Finally, I noticed one strange thing: the permissions on the /media/gordon folder had a plus sign (+) after them. A bit of Googling told me that this means the folder uses Access Control Lists to restrict access to the contents. I didn't really want to learn all about these, so I just changed the mount point to /media/Elements, and now it all is working fine.
Below are the final settings as seen in Disks:

SyncBack configuration
I ran into one more issue as I was wrapping things up. I found that SyncBackSE, which I use for backing up from our systems to the server, could not see the network share drive. It turns out that there is a "feature" in Windows Vista and later that prevents programs with elevated (i.e. "administrator") privileges from viewing network shares created by non-elevated or standard programs/users. This is pretty counterintuitive. But regardless, there is a registry hack (pulled from here) that turns this behavior off.Open Regedit, go to
HKEY_LOCAL_MACHINE/SOFTWARE/Microsoft/Windows/CurrentVersion/Policies/Systemthen add a new DWORD entry with the name EnableLinkedConnections, and set the value to 1.
Note: This post is part of a loose series. Go here for a full list of all posts in the series.
Subscribe to:
Posts (Atom)